On this page, we will provide you with information for your final project presentation. All things on this page are due on the day of final presentation.
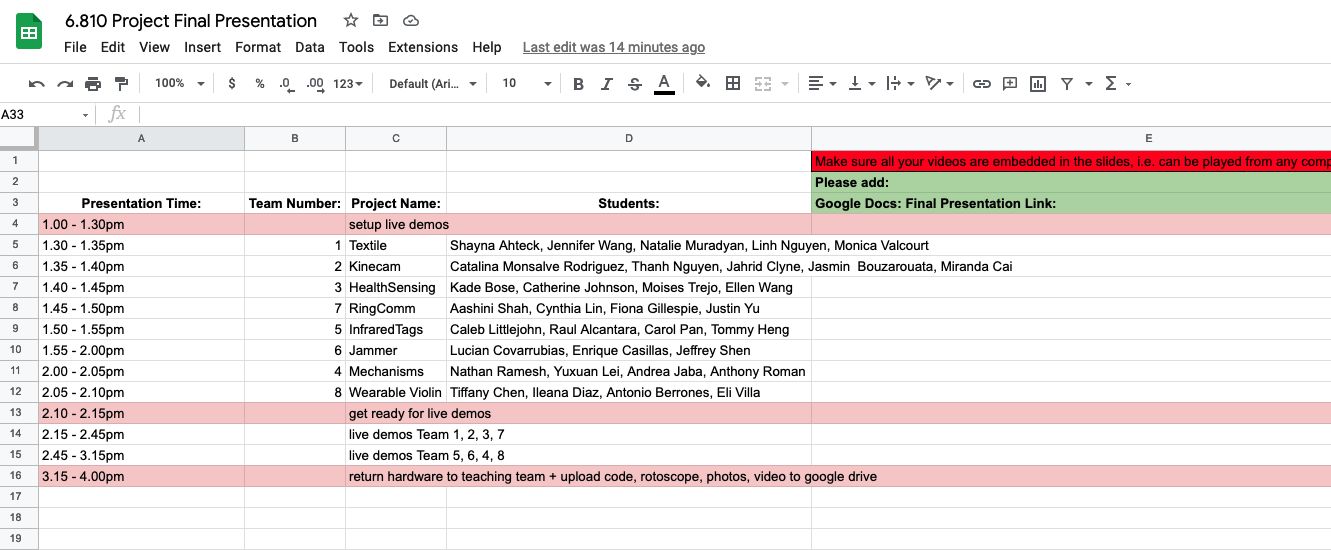
Presentation Time: Each team will have 5 minutes to present. There will be no questions this time, we will ask our questions during the live demo session. Since we have 8 teams, we will be done with this part after ca. 40 minutes. The second part of class will then be your live demos (more on this below).
Splitting the Talk among Presenters: Every student on the team needs to present a part of the slides. We recommend that each student presents the part they worked on but if that leads to too much switching back and forth you can also pick a different split. We know from the milestone spreadsheets who did what.
Template File in your Google Drive: There is a template file in your google drive called 9-final-presentation.gslides. Feel free to change the slide layout etc., this is just an example from last year to get you started.
Presentation Content: We leave the structure of the final presentation to you. We recommend to give a brief reminder about the problem and the solution. Then report on the progress since the midterm presentation (no need to repeat everything from the midterm, we already saw that). And then show your final product through the photos you made and the video.
Add Presentation Link to Spreadsheet: Once you are done with your slides, add the link to the slides here.
(2) Set Up Live Demo
After everyone finished their presentation, we will have a live demo session. 4 Teams will demo first (30 min), and then we will switch and have the other 4 teams demo (30 min).
We will go in the order of presentation (whoever presented among the first 4 teams will also demo first).
Types of Live Demos: There are different levels of live demo.
No functional device: Your device is just laying on the table, we can look at the hardware but it is not functional. You have at least a video running on a laptop that shows that it worked at some point.
Device can be used by somebody from your team: Your device is functional and can be live demo-ed by somebody from your own project team.
Device can be used by somebody from the teaching team: Your device is so robust that it works even when used by a member of the teaching team and not just by yourself.
Our expectation is that your device can be used by somebody from the teaching team. A non-functional demo is not sufficient and will lead to points lost.
(3) Upload Photos and Video of your Project
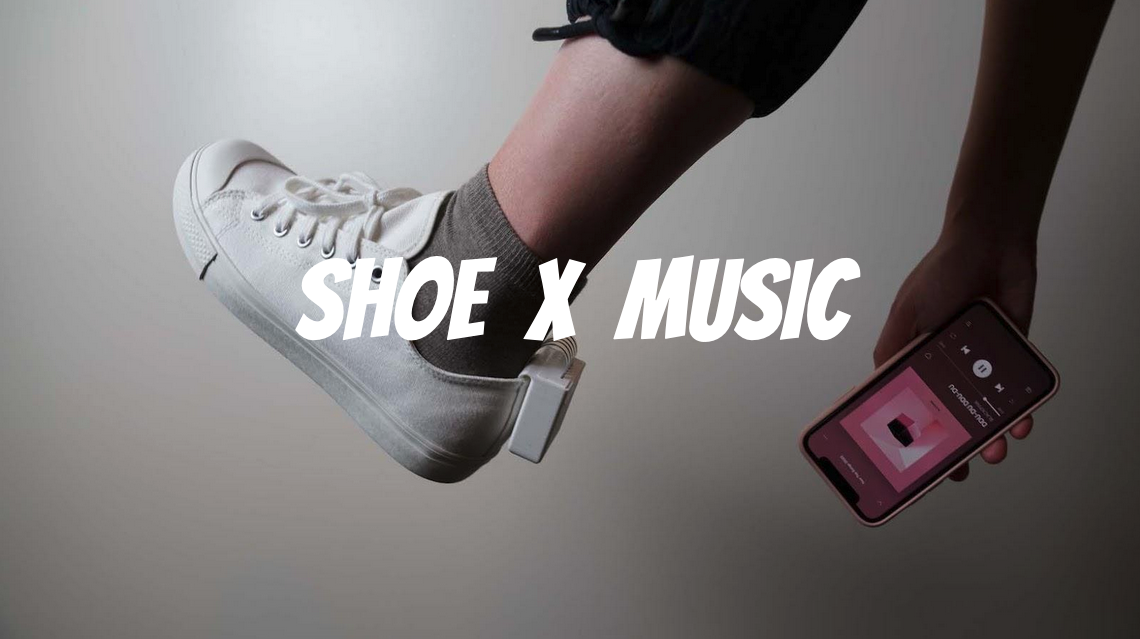
You already prepared a rotoscope for your project for the midterm presentation. For the final presentation, you now also need to take photos, e.g. of your hardware or the device in use on a user's body and make a video for your project.
Adding Photos and Video to Final Presentation: We recommend you use the photos in your final presentation and also add the video. If your video is longer than 1-2 minutes, consider showing only a portion of the video in the final presentation, so you also have some time to talk.
Adding Rotoscope, Photo, Video to Google Drive: Please upload your rotoscope, photos, and video to your team's google drive in the folder '10-rotoscope-photos-video'.
(4) Upload Code and Hardware Design Files
Finally, please upload all your code and hardware design files.
Code: For code, please upload either the code directly or provide a github repository link with all the code file. Make sure your code contains a readme file with instructions for how to run the code. Your code should also be properly documented.
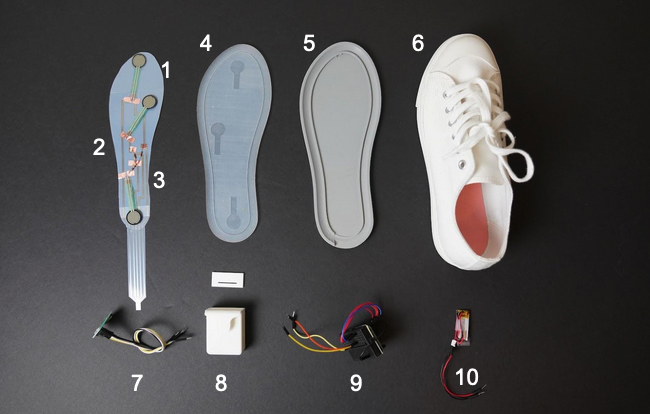
3D Model / Laser Cut / Inkjet Print Files: Please include any 3D model's you made for your project, both the source files (e.g. Blender or Solidworks files) and the 3D printable files (.stl). We also need files if you laser cut parts or inkjet printed circuits. Please clearly name the files so we know which file has which part.
PCB Files: If you made a PCB board with Eagle or another software, please include the electronic design files as well.
Other files: If we forgot to list something here, please still include it. There is a high chance that we will continue to work on the project with some of you, e.g. through a UROP and bring the project to publication, so we want to make sure that all the files are in the folder. In case the project will be published, we will make sure everyone receives credit who worked on the project, i.e. all our undergraduate researchers co-author the paper.